
Are you ready to bring this thing home? We’ve covered a lot of ground in this series. Now it’s time to create the email your readers want in return for sharing with you their email addresses. Let’s get to business and start building your first Mailchimp RSS campaign.
You’ve set up your forms, you are working on your freebie, and you have a working knowledge how Mailchimp can help you build your email list. Let’s get to business and start building your first Mailchimp RSS campaign.
{Updated for 2019}
There are two basic types of emails you can send to your readers.
The first is a Mailchimp RSS feed that is automatically sent out whenever you publish a post on your blog. The second is a newsletter with original content that you send out either weekly or monthly.

Let’s quickly get more details about each of these options.
Mailchimp RSS emails
An RSS email is self propagating. It does not contain original content outside of your blog post, but you can add items you want your readers to have, such as links to your social media or information about you and your products.
Mailchimp RSS emails are also auto-scheduled. Once you set up the schedule an RSS email will go out every time you publish a new post on your site. You can schedule this to occur daily, weekly, or monthly. Mailchimp does the work and your readers see what you’ve been up to on your blog.
Newsletters
A newsletter is completely original content. You can share links, videos, graphics, blog posts, and much more. It should be content that you have not published anywhere else on the interwebs and it should be heavily weighted with information that helps your readers, not just content promoting yourself or your products.
With newsletters you decide when your readers receive your content and you self-schedule it for the day and time you want it delivered.
We are going to start with learning to create an RSS feed email. Mailchimp has made it easy to set up this type of email in just minutes.
So, go ahead and get signed in to your Mailchimp account. I’ll meet you on the dashboard.
From here you have several ways to start creating what Mailchimp calls a campaign. A campaign is your email that gets sent to your list subscribers.
1. Upper left menu bar – CAMPAIGN
2. Upper right corner – CREATE
3. Right side – CREATE A CAMPAIGN
As you can see, there are lots of options for getting started. Go ahead and choose one.
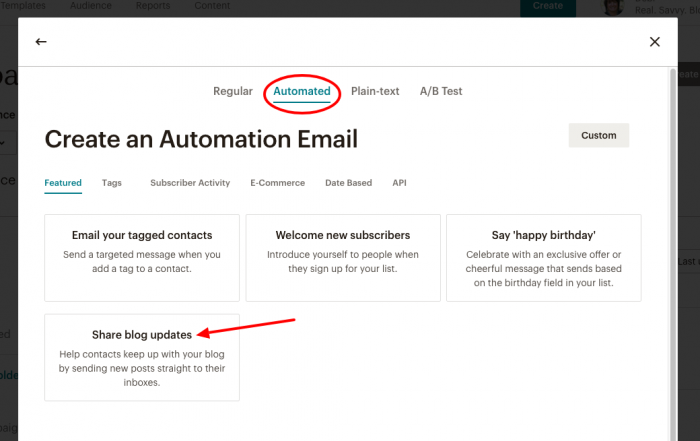
When the next box pops up you’ll have lots of options, again. Choose EMAIL.
When the next box pops open choose AUTOMATED and SHARE BLOG UPDATES.
Now you can name your campaign. Anything is fine but something like RSS email or Post Share works well. And, choose the list you want to use. You might only have one.
Click BEGIN.
Now, here is the most important part of sending an RSS-driven email. You must give Mailchimp your feed address so it can find your blog and pull your posts.
Your feed should be
yourdomain.com/feed
You can make sure your feed is viable at FeedValidator.
Next, choose the frequency of your campaign. Do you want to send it every day you post, once a week, or monthly? Most bloggers send either daily or weekly. Go ahead and play around with this section so you can see how it works.
You’ll notice if you decide to send a daily email you can also choose which days to send your campaign. You can also choose the time.
I suggest you send your campaigns at a time when most of your readers will be awake and ready to read your content. I prefer to send my campaigns when my east coast readers are fresh and so it will be waiting for my west coast readers.
When you have decided on when to send your campaign, click NEXT in the bottom right corner. You may notice the progress bar at the bottom of your screen. You can click any of these sections during campaign creation. You do not need to go in order, but it sure helps.
Now it’s time to choose your list. You can see you have options here too. Mailchimp is nothing if not great at giving you options.
Most likely, you will choose the SEND TO ENTIRE LIST option, but if you want to send a special email to a group or segment you can do so here.
Next, it’s time to get the details of this campaign.
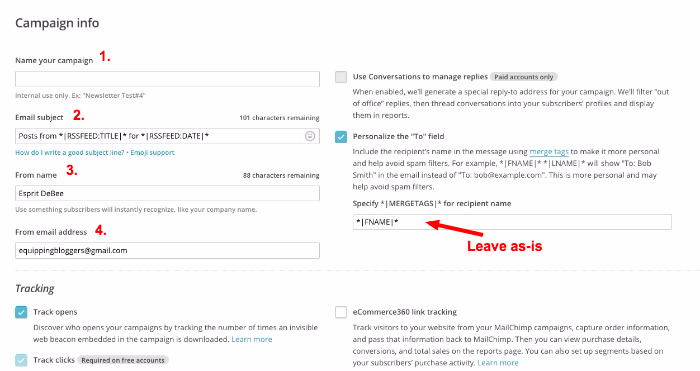
1. Name your campaign
This is only for your eyes. Your subscribers will not see the name of your campaign.
2. Email Subject
This section is defaulted to use merge tags to list your blog and the date. If you want to change this you can, of course. You can also keep it as is.
3. From Name
Mailchimp will default to your account name, but you can put your first name, your blog name, or whatever title you wish in this section. Just remember to keep it easy for readers to know who the email is from. Keeping it simple also keeps it out of the spam box.
4. From Email Address
If by chance you want to use a different email address than the one you used to sign up for Mailchimp, add it here.
That’s all you need to be worried about. There are some other default options and some choices you can make, but as a beginner, just leave everything else on this page as-is.
Now we’re getting to the good stuff. The template. Currently, you are on the SELECT A TEMPLATE page.
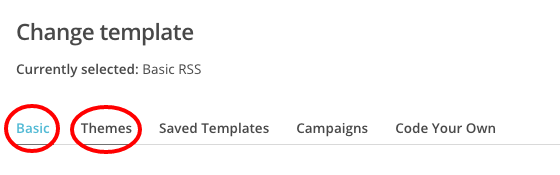
At the top of the page you will see a menu of options. As a beginner, you want to choose either BASIC or THEMES. You choose what you want to use. You might even play around a little to see how it all looks. No worries. You can always change it later.
Welcome to the design page. This page is so detailed we are going to pick it up in our next lesson and break down each part. If you need to take a break and come back to this section, go to the upper right corner of your screen where it says SAVE & EXIT. Go ahead and LOG OUT.
Great job on getting this far. You’re making amazing progress and will have your first campaign up and running in no time, but we want to do it right, so come back for the next lesson and we’ll start playing around with this powerful part of Mailchimp.
#YouCanDoThis

Leave a Reply